Welcome to our Winter Season! I’ve tried to link directly to the posts containing recipes for cooking greens and squash, but haven’t figured it out, so if you want to see a lot of recipes, see the list of posts on the right of this page, and click on those links.
There are a lot of yummy recipes in that post, but our favorite way to cook a “Festival” is just to slice it in half (more chopping and rocking than slicing, really), scoop out the seeds, rub a little olive oil on the cut sides and inside, and place the halves cut-side down on a cookie sheet. Bake it at 350° for about 1/2 hour, or 40 minutes, until a fork will slide into the flesh easily. Then a little salt and pepper, and/or butter and my kids will ask for seconds and thirds. They’re just sweet enough to not need anything extra. Of course, they’re also delicious stuffed with a savory mess as well.
“Purple Viking” potatoes are one of my favorites. Not only are they pretty with their purple and pink splashed skin, and striking white flesh, but they are delicious and good for just about everything. They bake, steam, and roast well. They’re great fried up for breakfast. What more can I say—admire them and then devour.
Beets, oh beets. I’m putting together a separate post on beet recipes, because it’s one of the top vegetables I get asked “what do I do with this?” Basically though, I generally roast them. Cut them into chunks (smaller pieces will cook faster). Preheat your oven to 400°. Put the chunks in a roasting pan, drizzle with olive oil, sprinkle with salt and pepper (and rosemary, thyme, or whatever else you like), and put in the oven. Stir them around after about 15 minutes and again in another 15 minutes. Take them out when they’re tender. You can roast beets alone or with other roots. They take longer than potatoes, so if you want to do them together, cut the potatoes into bigger pieces.
I think everyone probably is aware of arugula these days—the slightly spicy, bitter, nutty salad green. There is a recipe in the Summer Week 20 post for a tasty salad, but it’s also good with blue cheese and pears, or nuts and apples.
Mizuna is very mild, better for salad or wilting simply than as a cooking green. I like to make a bed of mizuna on my plate and place a chunk of grilled/broiled meat or salmon on top. That way it gently steams and wilts and soaks up juices too.
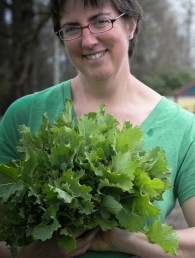
Mustard Greens are spicy, and I know they’re not everyone’s favorite. But the purple ones are so pretty, and they’re good for you. Try any of the recipes in the Cooking Greens post, or top with strong cheese, if you like it—like parmesan, romano, or fontina.
The last minute frost hurt the Swiss Chard pretty badly, so we’ll have to save that for next week or the week after. Hopefully the really cold weather will hold off for a bit, since it does make things harder for us, harvest-wise. And it makes for a late start in the mornings, which makes us late for everything. Please have patience on those frosty mornings.
>There is no doubt that greens are good for you. The trick is how to trick everyone into eating them. A stolid few eat full-grown kale, mustard, or dandelions as a raw salad, but what about the rest of us?
Cooking the stronger-flavored greens will make them palatable to many, as will tempering the bitter greens with vinegar or lemon juice. At our table (which includes small children) butter, bacon, and/or cheese go a long way. Spicy flavors don’t work for my family, but they do serve to wake up many of the greens-impaired.
So, experiment—and remember that these recipes are just a guide!
VARIOUS GREENS RANKED BY FLAVOR MILD: Spinach Swiss Chard Beet Greens Bok Choi Tatsoi
BITTER: Pan di Zucchero Escarole & Endive Turnip Greens Radicchio Dandelion
SPICY: Collards & Kale Mustard Greens Arugula Watercress Pepper Cress
TANGY: Sorrel
FARM-STYLE BRAISED GREENS 2 strips Bacon 1 tbsp. Butter 1 Small onion, finely chopped 1 pound Greens, stems removed, roughly chopped Salt and Fresh Ground Black Pepper Pinch of Ground Allspice 1 tbsp. Red Wine Vinegar 1 Lemon, sliced thin
1. Sauté the bacon strips in a large skillet until crisp. Drain on paper towels. Crumble and reserve. 2. Add the butter to the bacon drippings in the skillet. Cook the onion over medium-low heat until golden, about 5 minutes. 3. Meanwhile, rinse the greens in cold water. 4. Add the greens to the skillet, with just the water that clings to the leaves. Cook, covered, stirring occasionally, until tender, 15 to 20 minutes. Add salt and pepper to taste, the allspice, and the vinegar. Sprinkle with the reserved bacon and garnish with lemon slices.
GREENS CUSTARD 4 tbsp. Butter 1 Large Onion, finely chopped 1 pound Greens, stems and leaves chopped separately 1/4 cup Milk 1/2 cup Cream 1/2 tsp. Salt 1/4 tsp. Fresh Ground Black Pepper 2/3 cup Fresh Bread Crumbs 1/2 cup Grated Jarlsberg Cheese 5 Eggs, lightly beaten
1. Melt 1 tbsp. butter in a large skillet over medium heat. Add the onion and cook 2 minutes. Stir in the stems and cook, covered, until tender. about 15 minutes. Stir in the leaves and cook, covered, until tender, about 3 minutes. Raise the heat to medium-high and remove the cover. Cook, tossing constantly until all liquid has evaporated. Transfer to a large bowl and set aside to cool. 2. Preheat the oven to 325°. Melt the remaining 3 tbsp. butter and add it with the remaining ingredients to the greens in the bowl. Mix well and pour into a buttered 1-1/2 quart soufflé dish. Place the dish in a roasting pan. Pour boiling water in the pan to half the depth of the soufflé dish. Bake until a knife inserted in the center comes out clean, 45 minutes to 1 hour. Remove the dish from the pan and let stand 10 minutes. 3. Run a sharp knife around the edges of the souffé dish and very carefully invert it onto a shallow serving platter and serve.
GREEK MIXED GREENS (HORTA) Salt 1-1/2 pounds Mixed Greens, well-washed, trimmed, and coarsely chopped 1/4 cup Olive Oil 5 Scallions (or baby leeks), cut crosswise into fine rings 2 Garlic Cloves, lightly crushed and peeled but left whole 4 tsp. Fresh Lemon Juice 1 tbsp. Olive Oil
1. Bring a large pot of water to a rolling boil with 1 tbsp. salt. Drop in the greens and boil for about 10 minutes. Drain. 2. Put the 1/4 cup olive oil in a large frying pan or sauté pan and set over medium-high heat. When hot, add the scallions and garlic. Stir and fry for a minute. Add the greens and about 1/2 tsp. salt (taste as you go) and mix well. Turn off the heat. Put the contents of the pan into a serving dish. Dribble the lemon juice and olive oil over the top and serve immediately.
Note: Any combination of 2 to 3 bunches of greens can be used. Try these winners: • Swiss Chard, Dandelion, and Turnip Greens • Beet Greens, Mustard, and Sorrel • Kale, Mustard, and Dandelion
SMASHED POTATOES WITH BITTER GREENS AND SWEET ONIONS 8 Medium Waxy-Type Potatoes, about 1-1/4 pounds 1 tbsp. Salt 1 tsp. Olive Oil 2 tbsp. Butter 1 large Sweet Onion, sliced 1/4 inch thick 1 tbsp. Dark Brown Sugar 1/4 tsp. Ground Pepper 1/2 cup Hot Milk or Stock, or more as needed 1 big bunch Dandelion, Arugula, or other Greens, washed
1. Place whole potatoes and 2 tsp. salt in a large pot and add water to cover. Bring to a boil. Reduce heat to medium high & cook until tender, 30 to 35 minutes. Drain, return to pot, and keep warm. 2. While potatoes are cooking, heat olive oil and 1 tsp. butter in a medium skillet over medium heat. Add onions and sugar, 1/2 tsp. salt, and 1/8 tsp. pepper. Sauté, stirring occasionally, until caramelized, about 20 minutes. Set aside. 3. Meanwhile, remove stems from greens. Roughly chop a quarter of the greens and set aside. Place remainder in a serving bowl. 4. While potatoes are still hot, roughly mash using a large fork or a whisk. Add hot milk or stock, remaining butter, 1/2 tsp. salt, and 1/8 tsp. pepper. Mash to combine. Stir in half the onions and the chopped greens. Place potatoes over greens in bowl. Top with remaining onions. Seve hot.
GREENS GRATIN 2-1/2 pounds Sturdy Greens, stems removed 4-1/2 tbsp. Butter 2-1/2 tbsp. All-Purpose Flour 1 cup Chicken or Vegetable Stock, hot 1/2 cup Grated Gruyére or Jarlsberg Cheese 1/2 tsp. Salt 1/2 tsp. Fresh Ground Black Pepper 1/4 tsp. Grated Nutmeg Dash of Hot Pepper Sauce (optional) 1/2 cup Fresh Bread Crumbs
1. Preheat the oven to 425°. Cook the greens, covered, in boiling salted water until very tender, about 15 minutes. Rinse under cold running water; drain, pressing out all the liquid with the back of a spoon. Chop fine. 2. Melt 2-1/2 tbsp. of the butter in a medium saucepan over low heat. Stir in the flour. Cook, stirring constantly, 2 minutes. Whisk in the hot stock. Cook until very thick, about 2 minutes. Add 1/4 cup of the cheese, the salt, pepper, nutmeg, and hot pepper sauce. Stir in the greens. Transfer to a buttered shallow baking dish. 3. Melt the remaining 2 tbsp. butter in a small skillet over medium heat. Stir in the bread crumbs. Cook, stirring constantly, until golden. Spoon over the greens mixture. Sprinkle with the remaining 1/4 cup cheese. Bake until bubbly, 15 to 20 minutes.
STIR-FRIED GREENS WITH GINGER & GREEN CHILES 3 tbsp. Peanut or Canola Oil 1 Fresh Hot Green Chile, cut into long, fine slivers 3 slices Fresh Ginger, cut into long, fine slivers 1 pound Greens, cut crosswise into fine ribbons. 1/3 tsp. Salt, or to taste
1. Put the oil in a large pan and set over medium-high heat. When hot, put in the chile and ginger. Stir a few times and put in the beet greens. Stir a few times and then cover the pan. Turn the heat down to low and cook until the leaves have wilted. Add the salt and stir a few times. Add 4 tbsp. of water, bring to a simmer, and cover. Cook on low heat for about 30 minutes, or until the greens are tender. Stir every now and then during this period.
SPICY SAUTÉED GREENS 2 pounds Greens (2 big bunches), tough stems removed and leaves cut crosswise into 4-inch pieces 1/4 cup Olive Oil 2 Large Garlic Cloves (more if desired) 1/2 tsp. Dried Hot Red Pepper Flakes 1/2 tsp. Salt
1. Cook greens in a 6- to 8-quart pot of boiling salted water until ribs are tender, 4 to 5 minutes, then drain in a colander. Rinse under cold water to stop cooking and drain well, gently pressing out excess water. 2. Heat oil in a 12-inch heavy skillet over moderate heat until hot but not smoking, then cook garlic, stirring, until pale golden, about 30 seconds. Increase heat to medium-high, then add greens, red pepper flakes, and salt and sauté, stirring , until liquid greens give off is evaporated, about 4 minutes. 3. Top with grated Parmesan cheese if desired.
Note: This recipe works really well for Dandelion grens, but any bitter green can be used, or even a sweeter green like Chard or Spinach. Just remember that the lighter greens will take less time to cook. If you use a bitter green and the flavor is still too bitter for your taste after cooking, try dressing the greens with something acidic, like lemon juice or a vinaigrette—this will temper the bitterness.
>THIS WEEK’S SUBSCRIBER MENU: • Pie Pumpkins or Various Squashes • “Russian Blue” Potatoes • Japanese Turnips • Garlic • Arugula • Swiss Chard • Tatsoi or Kohlrabi
U-PICK THIS WEEK: While we do have a pumpkin “patch”, it’s pretty muddy after all the rain lately, so we have put together a smaller patch up by the farm stand. You are welcome to make the trek to the big patch, but you do have the option of sticking close to your car. 🙂
WINTER SHARES start next week. This is the end of our summer season. Thank you for being with us through the last five months!
There are no eggs. It has nothing to do with their mood, or the number of roosters we have living with them, or their food. It’s all about the daylength. Our days are getting shorter, and the chicken egg-laying cycle is dictated by the amount of daylight they see. They gear down in the fall, stop making eggs so they can exchange their feathers for a new suit, and rest up for spring, when the daylength and food supply is increasing, and the conditions are better for raising children. There’s a reason why Easter is about eggs. Right now the hens are looking terrible. They look like they’ve been through a plucking machine, and there are feathers everywhere. They really need their new plumage soon. In the past, we’ve hung lights in the chicken house, just to add a few hours at the beginning and end of the day. Last year the chickens never molted because we tricked them too well. They did continue laying eggs for us, but they are weary now and need a rest. It takes a lot of protein to grow new feathers AND make an egg every day. So, we feel like giving them their rest this year and they will reward us with more nutritious eggs in the spring. If you have an egg card, you can keep it until next year and start using it again in the spring.
There is something glorious about fall for me. I love the colors, especially the vivid reds and golds against looming dark thunderclouds. It makes me joyful. I love harvesting winter squashes, filling bins with all the different shapes and colors, knowing that each one is delicious in it’s own way, dreaming of soups, casseroles, or just salt and pepper on that little one. Wondering what all the new varieties we planted will taste like. Then tucking the bins all away, saving them for the winter, like squirrels burying the chestnuts in our front yard.
The pole beans are molten vines now, the leaves yellow and in beatiful long lines. The radicchio has turned bright red with the change in daylength, and the greens are sweeter now that there’s a chill in the air. And once everything is touched by frost, it will all be even sweeter.
All in all, this has been a good year for us. Mike and I learned again how to do much of the work ourselves, and it brought us closer together. We haven’t done so much work together since before the babies were born. Every year the kids get a little older, and everything seems to get a little easier as they become more self sufficient. We had farm help that wasn’t helpful over the stretch of summer, but we did figure out which jobs to hire out next year, and which to change so that we wouldn’t need to rely on so much help. I will elaborate on the changes we’re making when I send out the new summer flyers and invitations to spring shares.
But, we feel like we did a good job providing food for you. Even if we had to let the flower garden go (which I feel terrible about, especially since it was so great last year) we did manage to grow pumpkins, even though the big ones didn’t make it. And there was plenty to eat, with plenty more to come in the next few months. We feel so fortunate to be able to provide for all of you, and nourish your families with these delicious, healthy vegetables. And we are fortunate to have all of you supporting us throughout the year(s).
Thank you so much. Shelley, Mike, Della, and Cosmo
See the separate post on cooking greens for more ideas on those.
CITRUS GLAZED TURNIPS 1 pound Turnips (about 2 pounds with greens attached) Juice of one Whole Orange (about 1/3 cup) 1 1/2 tablespoons Butter 1/2 teaspoon Sugar Salt and Pepper
1. Trim baby turnips, leaving about 1/2-inch stems if greens were attached, and peel if desired. In a steamer set over boiling water steam turnips, covered, until just tender, 6 to 8 minutes. Vegetables may be prepared up to this point 1 day in advance and kept covered and chilled. 2. Melt the butter, add sugar and juice into a large heavy skillet on medium heat. Stir sauce until reduced slightly, then lower heat slightly. Add vegetables and cook until heated through and glazed, about 4 minutes.
ARUGULA AND OLIVE SALAD About 14 ounces Arugula 20 oil-cured Black Olives (Kalamata olives are tasty too) 2 slices firm-textured White Bread 1-1/2 tsp. Virgin Olive Oil LEMON DRESSING 1-1/2 tbsp. Lemon Juice 2 tbsp. Virgin Olive Oil 1/4 tsp. Salt 1/8 tsp. freshly-ground Black Pepper
1. Preheat oven to 400°. 2. Wash the arugula, removing and discarding the tough outer leaves and stems. Dry it thoroughly, taking care not to bruise the leaves. 3. Pit the olives and cut them into 1/2-inch pieces. 4. Trim the crusts from the bread slices, and cut the bread into 1/2-inch cubes. Place the bread cubes in a bowl, add the 1-1/2 tsp. of olive oil, and toss to coat them well. Arrange the cubes on a baking tray, and bake them at 400° for 8 minutes, until they are well browned. Set aside. 5. In a bowl large enough to hold the arugula, mix dressing ingredients. Add the arugula to the bowl containing the dressing, and toss well to combine. Divide the arugula among four plates, and sprinkle the olives and croutons on top and around the greens. Serve immediately.
TEN MINUTE PASTA DINNER WITH ARUGULA (OR SPINACH) 3/4 Pasta, any shape 1 to 2 tbsp. Olive Oil 1 tbsp. Minced Garlic Chopped Fresh Arugula or Spinach (a few handfuls) 1/3 cup Grated Pecorino or Parmesan Cheese (or more, to taste) Red Pepper Flakes
1. Put a pot of water on to boil, and when it does, add the pasta. 2. Drain the pasta, transfer it to a bowl, and drizzle with olive oil to taste. Toss with a long-handled fork or with tongs, adding the garlic and greens, and sprinkling in the cheese and pepper flakes as you toss. 3. Serve hot, possibly accompanied by leftover cooked vegetables, straight from the refrigerator or heated in the microwave.
FRUIT SHARES: Fruit Shares are finished for the season. We hope you enjoyed/are enjoying the Bosc pears from Cliffside Orchards we distributed last week as a fruit bonus.
U-PICK THIS WEEK: While we do have a pumpkin “patch”, it’s pretty muddy after all the rain lately, so we have put together a smaller patch up by the farm stand. You are welcome to make the trek to the big patch, but you do have the option of sticking close to your car. 🙂
COMING SOON: Japanese Turnips Arugula More Squashes Potatoes
WINTER SHARES start in two weeks, beginning October 31. There is one week remaining of our summer season.
>Up until about ten years ago, when I first started visiting farmer’s markets, I hated winter squash. I knew it either as a frozen orange brick, or as a chunk of nameless, flavorless yellow stuff, wrapped in plastic, from the produce section, and it always made me gag. I just couldn’t swallow it. Everything changed the day I cooked a “Delicata”. Now we delight in all kinds of squash, knowing that they all have different cooking needs and flavors.
While all squash are in the gourd, or Cucurbita family, there are four primary groups of winter squash, each with their own characteristics—when in doubt examine the squash’s shape and stem. C. maxima contains the largest squashes, like the Hubbards, Bananas, and Great Pumpkins—some over 800 pounds. Their stems are round and have a corky texture. C. moschata includes the Butternut and Cheese Pumpkin, and typically have a smooth tan skin and a hard, ridged stem that flares where it meets the fruit. These are capable of the longest storage and will sweeten over time. C. pepo includes most of the summer squashes, as well as the Acorn, Delicata, Sugar Pumpkins, and traditional field pumpkins we carve into Jack-o-Lanterns. C. agyrosperma includes several varieties that need a very long, hot growing season—they prefer southern climates and are difficult to identify by their stems alone. We can’t grow them here, so I don’t even know what they look like.
All winter squashes are built for storage and can last for several months if kept in a cool (50–60°), dark, dry location.
The maxima varieties tend to be dry-textured, and will taste best if cut into chunks and steamed or baked. Try putting the chunks in a baking pan—skin side down—with an inch of water in the pan. Add a pat of butter to the non-skin side and a little salt, and bake at 350° for 45–60 minutes. Once cooked, try them mashed with potatoes or other root vegetables.
The pepo and moschata varieties will tend to fall apart and lose flavor if steamed. To bake the little guys, try placing them cut side down in a baking pan with about 1 tablespoon of olive oil. Bake at 400° for about 20 minutes, then turn them over and lower the heat to 350° for another 20–30 minutes. (I like a little butter inside, too.) Butternut and kabocha/buttercup squashes are actually quite good when cut into chunks and added to soup—just treat them like potatoes.
Check this page for information on how to cut into a winter squash.
Acorn—A.K.A. “Danish Squash”. Common variety with dark green or black ridged skin and a nutty flavor—not sweet. Delicious with a sweet or savory stuffing. C. pepo
Ambercup—This red Buttercup has a very high sugar content. The same rich, sweet flavor with no button. Best steamed or baked with a little liquid to keep from drying out. C. maxima
Blue Banana—Most Banana squash are huge, but this smaller variety is just right. With thick, firm flesh, it’s great for roasting or baking. C. maxima
Buttercup—Rich, sweet flavor and dry, flaky flesh. Very high sugar content. Best steamed or baked with a little liquid to keep from drying out. Also great for soup or gnocchi. C. maxima
Butternut—With its fine-textured creamy orange flesh and delicious sweet taste, this squash is good for everything. C. moschata
Chicago Warted Hubbard—The original Hubbard—large (usually 30 pounds), dark green, and very warty. At some point the smooth-skinned hubbard came along and became more economical to grow, but the standard of squash flavor still starts here. C. maxima
Delicata—A small and long with cream skin and green ridges. Also known as the “Sweet Potato” or “Peanut” squash. The flesh is fine and sweet and will make 2 servings, but once you taste it, you’ll want one all for yourself. C. pepo
Fairy—This butternut relative has thick, honeyed flesh and golden-streaked skin. Excellent in soups or pies, or baked and stuffed. C. moschata
Festival—Somewhere between the Acorn and Delicata lies the qualities of this squash. Light and sweet, deeper than Acorn and almost as rich as Delicata, this squash is a winner. C. pepo
Fordhook Acorn—Introduced in 1890 and nearly lost commercially, the long, golden Acorn-type fruits are beautiful and tasty. C. pepo
Gold Nugget—This variety was bred as a sweet potato substitute for short-season areas. Golden, melt-in-your-mouth flesh. Steam or bake. C. maxima
Heart of Gold—An Acorn type with deeper flavor and higher sugar content. Not quite as sweet as Festival, but sweeter than a true Acorn. C. pepo
Red Kuri—A.K.A. “Orange Hokkaido” or “Baby Red Hubbard”, this is a Japanese variety highly regarded in the macrobiotic diet. Best treated like a Hubbard and will make 3–5 servings. C. maxima
Kabocha—Dry, flaky, sweet, and nutty. Some folks describe the flavor and texture as “like chestnuts”. C. maxima
Spaghetti—Bake or microwave whole. Then use a fork to fluff the spaghetti-like strands of flesh. Toss with your favorite sauce, or just olive oil and good Parmesan cheese. C. pepo
Sugarloaf—A sweeter, drier-textured Delicata, with tan skin and a squat shape. Like Delicata, these will make 2 servings, but don’t be surprised if you eat the whole thing by yourself. C. pepo
New England Pie Pumpkin—Smooth, orange flesh and fine flavor have made this variety a winner for centuries. C. pepo
Rouge Vif D’Etampes—Sweet, dense, rich, fruity-flavored flesh, excellent in pies or soup. This pumpkin was the model for Cinderella’s coach. C. maxima
Sweet Meat—This Northwest heirloom variety with slate-grey skin has the potential to grow quite large—10 pounds or more! These will make 8 or more delicious, nutty, sweet servings, and it stores very well. C. maxima
DELICATA CHIPS
SAVORY SQUASH GRATIN
7 cloves Garlic
1/2 tsp. Olive Oil
2 medium Acorn Squashes, halved crosswise and seeded
1/2 pound Kale, large stems removed
1 tsp. Butter
Salt and Pepper
1/2 tsp. Ground Nutmeg
2 1/2 tsp. chopped Fresh Thyme, or 1 1/2 tsp. Dried Thyme Leaves
2 1/4 cups Cream
3 tbsp. Bread Crumbs
2/3 cup Grated Parmesan
1. Heat oven to 450°. Place garlic in an ovenproof dish and drizzle with olive oil. Roast until light brown and very soft, about 20 minutes. Let stand until cool enough to handle; peel and cut into slivers; set aside. Reduce oven temp. to 400°.
2. Peel squash and cut lengthwise into 1/4-inch-thick slices; set aside.
3. Steam kale until brightly-colored and wilted, about 1 minute, then chop roughly. Squeeze out as much water as possible and set aside.
4. Butter a 2 1/2-quart baking dish. Distribute half the sliced squash in the dish, reserving the prettiest slices for the top layer, and sprinkle with 1/3 of the nutmeg, salt and pepper. Distribute half the sliced garlic over the squash and sprinkle with 1/2 of the thyme.
5. Arrange the kale over squash and sprinkle with 1/3 of the salt, pepper and nutmeg. Arrange remaining squash over kale and sprinkle with remaining nutmeg, salt, pepper and thyme. Distribute remaining garlic over squash, tucking it between slices.
6. Pour cream over assembled gratin and cover with foil. Bake until squash is soft when pierced with the tip of a knife, 40 minutes; halfway through baking time, remove foil, press down on squash with a spatula to compress and distribute the liquid, cover and continue baking. Meanwhile, combine bread crumbs and parmesan.
7. After the 40 minutes, reduce oven temp. to 375° and sprinkle the bread crumbs and parmesan over the squash, return to oven and continue to bake, uncovered until golden brown. Let cool 15 minutes before serving.
1. Melt 1 tbsp. of the butter in a large heavy skillet over low heat. Add the wine and garlic. Cook, covered, stirring occasionally, 20 minutes. The garlic will brown slightly but should not burn.
2. Mash the garlic with a fork. Stir in the remaining 2 tbsp. butter and the squash. Toss thoroughly to coat. Cook, covered, stirring occasionally, until the squash is tender, about 20 minutes. Add salt and pepper to taste and sprinkle with the parsley.
APPLE & PUMPKIN SOUP
4 cups Chicken Stock
4 Apples, peeled, cored, and diced
2 cups diced Pumpkin
1 small Onion, diced
1/2 tsp. Cinnamon
1/2 tsp. freshly grated Nutmeg
1/2 tsp. ground Coriander
1 cup Rockridge Orchards Apple Cider
1/2 cup Sour Cream
Salt and Pepper
1/4 cup chopped Chives
1. In a large nonreactive pot, bring stock to a boil.
2. Add apples, pumpkin, onion, cinnamon, nutmeg and coriander. Simmer, partly covered, 30 minutes.
3. Purée mixture in a food processor or blender. Return to pot.
4. In a small bowl, whisk together cider and sour cream until smooth. Stir into soup mixture and reaheat gently. Taste for salt and pepper.
5. Sprinkle with chives if desired and serve.
PUMPKIN (SQUASH) MUSH
2 cups Milk
1 cup Puréed Pumpkin or Squash
2/3 cup Yellow Cornmeal
1/3 cup Cold Water
1/4 tsp. Salt
1 tsp. Ground Ginger
1. Put the milk and pumpkin in a heavy-bottomed saucepan with a lid. Heat, stirring to blend, over medium-low heat.
2. Put the cornmeal in a small bowl and stir in the cold water. Stir the cornmeal mixture into the milk and pumpkin, and add the salt and ginger. Cook until thickened, stirring to keep the mush from burning. The mush will be done in 3 or 4 minutes. Remove from the heat and spoon into bowls. Serve hot.
(This is really yummy with a little cream or milk and maple syrup!)
WINTER SQUASH PURÉE
2 pounds Winter Squash, any type except Spaghetti
Salt and Pepper
4 cloves Garlic, peeled
6 Sage Leaves
1/4 pound Butter (use less if desired)
3/4 cup Milk or Stock
1. Preheat oven to 400°.
2. Cut the squashes in half lengthwise. Scoop out the seeds. Season the flesh with salt and pepper, and fill the cavities with the garlic cloves and the sage. Place the squashes skin side down, in a shallow ovenproof dish, and add just enough water to barely cover the bottom, to prevent burning. Bake for about 45 minutes, or until completely tender. Allow to cool. Remove and discard the garlic and sage.
3. In a small saucepan, melt the butter in the milk over low heat. Scoop othe squash flesh out of the skin and put through a food mill or a ricer. Whisk in the milk and butter (or stock) to give a soft texture to the purée. Taste and adjust seasoning.
BAKED WINTER SQUASH SOUP
2 Acorn Squash & 2 Butternut Squash (or any combination of winter squashes adding up to about 10–12 pounds)
8 tbsp. (1 stick) Butter
8 tsp. Dark Brown Sugar
3 Carrots, halved
1 Large Onion, thinly sliced
10 cups Chicken Stock
3/4 tsp. Ground Mace
3/4 tsp. Ground Ginger
Pinch of Cayenne Pepper
Salt, to taste
Sour Cream and Chives for Garnish
1 Preheat oven to 350°.
2. Cut the squashes in half lengthwise. Scoop out and discard seeds.
3. Place the squash halves, skin side down, in a shallow roasting pan. Place 1 tbsp. of the butter and 1 tsp. of the brown sugar in the cavity of each squash half. Arrange the carrots and onion slices around the squash Pour 2 cups of the stock in the pan, cover it tightly with aluminum foil, and bake for 2 hours.
4. Remove the pan from the oven, and allow the vegetables to cool slightly. Scoop the squash pulp out of the skins and place it in a soup pot. Add the carrots, onions, and the cooking liquid.
5. Add the remaining 8 cups chicken stock and the mace, ginger, cayenne, and salt. Stir well, and bring to a boil. Reduce the heat and simmer, uncovered for 10 minutes.
6. Purée the soup, in batches, in a blender or food processor until smooth. Return it to the pot, adjust the seasonings, and heat through. Serve each portion garnished with a dollop of sour cream and a sprinkling of chives, if desired.
SPAGHETTI SQUASH CASSEROLE
1 Spaghetti Squash (4 to 5 pounds)
4 Ripe Tomatoes (or 1 16-oz can of chopped plum tomatoes)
3 tbsp. Olive Oil
2 cloves Garlic, minced
1 tsp. Salt
Ground Black Pepper to taste
1/2 cup shredded Mozzarella Cheese
1/4 cup grated Parmesan Cheese
1/4 cup chopped Scallions
Grated Parmesan Cheese for garnish
1. Preheat oven to 350°. Cut the squash in half and place face down on a baking dish with a few drops of water to prevent burning. Bake until the squash can be pierced easily with a fork. (30–45 minutes).
2. If using fresh tomatoes, peel, core and coarsely chop them. Pour off the excess liquid.
4. Over medium-high heat, sauté the garlic in 1 tbsp. olive oil until it is crisp.
5. Halve the squash and scrape out the seeds. Using a fork, scoop out the pulp and transfer the spaghetti-like strands to a 2-1/2 quart casserole dish. Add the tomatoes, garlic and oil, salt, pepper, and remaining 3 tbsp. olive oil; toss well. Top with the mozzarella, Parmesan, and scallions.
6. Bake at 350° until heated through, about 35 minutes. Serve with additional Parmesan on the side.
FRUIT SHARES: “Elstar” apples from Cliffside Orchards and Interlaken Seedless Grapes from Canales Produce in Concrete
U-PICK THIS WEEK: We start our pumpkin picking this week. While we do have a pumpkin “patch”, it’s pretty muddy after all the rain lately, so we will be assembling a smaller patch up by the farm stand this weekend. You are welcome to make the trek to the big patch, but you do have the option of sticking close to your car. 🙂
The beans are pretty much finished, so there is no other u-pick right now.
COMING SOON: Onions Tatsoi More Squashes Potatoes
“Festival” is a pretty little winter squash in the Acorn family, but it has more flavor and is sweeter than an acorn. You can simply cut in half, scoop out the seeds, and bake it at 350° until done, or you can put butter, cinnamon and nutmeg inside (and sugar, if you like things sweet like Mike) or you can use olive oil, garlic, fresh herbs, tomatoes, salt & pepper, etc. if you like it savory.
See the separate post on Winter Squash for extensive squash descriptions and lots of recipes!
Mizuna is a tender green in the mustard family. You can use it for salad, sauté it briefly, or use it as a bed for roasted meat, in which case the heat from the meat will wilt the greens and the juices will flavor it.
We’re nearing the end of the tomato season here. All the rain is sure to bring on the dreaded tomato blight, so enjoy this last blast of summer flavor. We will harvest what’s left of the green tomatoes soon as well, because they will be unlikely to ripen if the weather stays this cool.
And, sorrel. Sorrel is delicious in soup, something about the lemony flavor in a hot liquid is very soothing. You can heat up some stock and chop up the sorrel and toss it in at the end. You can also purée the sorrel and make a type of pesto, and swirl it into a soup. Or, use it in salad, cook it with your chard. Maybe combine the sorrel and mizuna in a little nest and place a piece of roasted salmon on top.
WINTER SHARES START IN JUST FOUR WEEKS, THE FIRST WEEK OF NOVEMBER!! LET US KNOW SOON IF YOU’LL BE JOINING US FOR A WONDERFUL LATE FALL AND WINTER SEASON!!
OUR SUMMER SEASON IS FINISHED THE LAST WEEK OF OCTOBER, THAT’S IN THREE WEEKS.
FRUIT SHARES: Assorted Asian Pears from Rockridge Orchards in Enumclaw and Thompson Seedless Grapes from Canales Produce in Concrete, and tasty little French Prunes from Anderson Acres for the Seattle folks who never got their extra blackberries 🙂
U-PICK THIS WEEK: Green Pole Beans, and Yellow and Green Romano Beans This will be the last week for U-Pick
>THIS WEEK’S SUBSCRIBER MENU: • “Borlotto Lamon” Shelling Beans from Italy • Beets • Summer Squash or Zucchini • Fennel or Kohlrabi or Kale • Romano Beans or Cabbage or other Greens • Tomatoes • Cucumbers • Fresh Thyme or Italian Parsley
FRUIT SHARES: Bartlett Pears from Cliffside Orchards in Kettle Falls and “Honeycrisp” apples from Tonnemakers Orchards in Royal City
U-PICK THIS WEEK: Green Pole Beans Wild Blackberries (when it’s not raining)
COMING SOON: Green Onions Winter Squashes Mizuna
PASTA WITH SHELL BEANS
2 pounds Fresh Shell Beans 5 large cloves Garlic 1/2 Onion 6 Fresh Thyme Sprigs Salt & Pepper 1/4 cup Extra Virgin Olive Oil, plus more for garnish 2 tbsp. chopped Italian Parsley 1 tbsp. chopped Fresh Sage 1/2 pound Tomatoes, peeled, seeded and finely diced 1 pound dried Pasta (rotelli, bowties, shells)
1. Shell beans and put in a large pot. Smash 2 garlic cloves and add to pot with onion, thyme and 6 cups water. Bring to a simmer, partially cover, and cook until beans are tender, 30 to 60 minutes. Season with salt and pepper and let cool in broth. 2. Mince remaining garlic. Heat 1/4 cup olive oil in a skillet over low heat. Add parsley , sage & garlic. Cook a minute or two to soften garlic. Add tomato and 1 cup of bean liquid. Season with salt & pepper. Bring to a simmer, cover, and cook, covered 20 minutes. Drain beans, reserving liquid. Discard thyme. Add beans to skillet and simmer for 10 minutes. 3. Cook pasta. Reheat beans, adding bean liquid if necessary—the beans should be brothy. Drain pasta, return to pot, add beans and sauce. Toss well and serve, drizzling with additional olive oil.
FRESH SHELL BEAN PURÉE ON GRILLED BREAD
1 pound Fresh Shell Beans (any variety or a mix) 2 or 3 cloves Garlic, peeled and sliced Salt and Pepper few sprigs Summer Savory or Rosemary 1/4 to 1/2 cup Extra-Virgin Olive Oil Grilled Country-Style Bread
1. Shell the beans. In a saucepan, cook the beans in lightly salted water until they are nearly falling apart. Drain them of all but a cup of their liquid. 2. To the beans in the saucepan, add the garlic; a little salt; the savory or rosemary; and about 1/4 cup olive oil. Cook and stir over low heat until the beans soften and begin to form a paste. Add more water if necessary. This will take 10 to 30 minutes. Taste while cooking and remove the herb sprigs when the beans have taken on enough flavor. (this is especially important with rosemary, which can become overpowering.) The garlic will soften and you can mash it into the beans; purée the beans and garlic in a food processor for a more uniform texture. Finish the purée with as much olive oil as your conscience allows and adjust the seasoning. 3. Serve on grilled country-style or levain bread toast that has been oiled and rubbed with a little garlic.
FRESH SHELL BEAN GRATIN
2 to 3 pounds Fresh Shell Beans (any variety or mix) Salt 6 tbsp. Olive Oil 1/2 Onion (or a few small Shallots), diced 4 cloves Garlic, cut into slivers 1 to 2 Sage Leaves, chopped 1 small bunch Greens (broccoli raab, chard, mustard, kale, turnip, etc.) 2 medium Tomatoes, roughly chopped 1/2 cup Toasted Bread Crumbs
1. Shell the beans. Cook them with just enough water to cover by an inch. Bring to a boil, add salt and 2 tbsp. olive oil, and lower to a simmer. Cook the beans until tender, about 30 minutes. Drain the beans and save the liquid. 2. While the beans are cooking, cook onion in 2 tbsp. olive oil with garlic, sage, and some salt.Cook over low heat until soft and translucent. Add the greens and a little of the bean water. Add the tomatoes, raise heat, and cook for a minute more. 3. Combine beans in a baking dish with the onions, tomatoes, and greens. Add enough bean water to almost cover. Pour the rest of the olive oil over the gratin. Cover top with toasted bread crumbs, and bake in a preheated 350° oven for 45 minutes. Check occasionally, moistening with bean water if too dry.
FRUIT SHARES: “Friar” plums and Asian Pears from Tonnemakers Orchards in Royal City
U-PICK THIS WEEK: Green Pole Beans Wild Blackberries (when it’s not raining)
COMING SOON: Shell Beans Green Onions
Fall is really in the air now, isn’t it? I’ve been ready for a while–this summer has been an exhausting one for us. The conversion from no child-care and two full-time interns to scrambling for child care and no workers has been difficult. Now that we know what to expect, we’re making different plans for next year. Though we’re both ready for fall to arrive in full force, with rain and wind, we’re exceptionally grateful that we’ve had this little blast of summer. It’s allowing us to get fall crops up and growing well, and the dryness is letting us take care of cultivating weeds one final time so we’ll be able to find those fall greens. I can taste the spinach and arugula now.
We are getting ready to harvest the winter squashes next week. It’s been a bumper year for them! Now we have to figure out where we’ll get 20 to 30 big cardboard bins (like watermelons and pumpkins are sold in at the store) for harvesting and storage. And then where to put all the bins! We’ll have to clean out the garage entirely! Nothing makes me happier than a big gathering of colorful winter squash though. It’s like money in the bank, and so pretty to look at. And delicious to eat!
Everyone knows now that we don’t have many eggs. The old hens have finally gone into recess, and we quit looking for eggs because there have only been two or three a day in the chicken house. Mind you, there are about 160 chickens there. So, the time has come to convert them to stewing hens. It’s sad to let the girls go, but it’s costing us about $18 a day to feed them and that adds up quickly. **Please let me know if you’d like a delicious stewer–they’re great for soup, not for roasting. They make delicious stock, and I plan on putting up 20 quarts or so when we’re done butchering.
The new flock, near the farm stand IS starting to produce though. While the eggs are small, we’re finding about 2 dozen a day there. This new flock is half the size of the old one–our new plan is to not try and sell eggs at the farmers markets any longer. We want to have them just for our subscribers. Raising chickens isn’t that much work, but it is expensive when no-one is laying. And we’ve had to feed the new birds since March to get any eggs too. Even when we have a lot of eggs, it’s a break-even deal for us, and that’s at $5.00 a dozen.
We’re trying something new with our pork too. We butcher pigs young for Brasa, because Tamara, the chef, likes them that way. We are going to try selling some of the little chops, ribs, and bellies in a few weeks. She gave us some of the baby chops from pigs we did last spring and they were delicious. Very tender and juicy. Everything will be vacuum-bagged and frozen. **Please let me know if you’d like information about these–there are only 7 half-sized pigs in this experiment.
**And, our Winter Season starts at the beginning of November. Actually the first pickup day is Halloween, and that’s not far away. I’ve posted the flyer/applications in the farm stand for you to take, but please let me know if you need any other information. I’ll be sending an email soon as well. Things are looking great for winter!
Kohlrabi are great just peeled and sliced up and eaten raw like an apple. Maybe a sprinkle of salt. That’s about as far as we usually get with them, because we eat them in the field. But here’s an easy way to cook it if you need it. Remember it’s related to broccoli and cabbage, just a swollen stem instead of a big head. And you can eat the leaves like kale. I love brassicas.
SIMPLE SAUTEED KOHLRABI 2 Medium Kohrabi Bulbs, grated 1 tsp. Salt 1/4 cup Butter or Light Oil 1 medium Onion, diced 1 clove Garlic, minced or pressed 2 bsp. chopped Fresh Thyme, Sage, or Chives
1. Mix the kohlrabi and salt into a colander and let stand for 30 minutes to drain. 2. Melt the butter in a medium skillet over medium heat. Add the onion and sauté until translucent, about 3 minutes. Add the garlic and sauté for 1 minute more. 3. Stir in the kohlrabi. Reuce the heat to low, cover, and cook for 10 minutes. 4. Increase the heat to medium, uncover the skillet, and cook for 2 minutes. Remove from heat and stir in the fresh herbs. Let stand for a couple minutes oto let the flavors develop.
Soup: 2 tbsp. Butter 2 tbsp. Vegetable Oil 1 medium Onion, sliced 1 to 2 cloves Garlic, crushed 1 medium or large FEnnel Bulb, roughly chopped 1 large Carrot, chopped 1 medium Potato, peeled a nd cubed 2 medium Tomatoes, peeled, seeded, chopped 3 cups Vegetable or Chicken Stock 1 tbsp. Pernod or Sambuca, optional 1/4 cup Cream or Silken Tofu Salt and Pepper Chopped Parsley
1. Prepare the Bouquet Garni: tie together the parsley, thyme, and bay leaf in a piece of cheesecloth. 2. Heat the butter and oil in a large saucepan over medium heat. Add the onion; sauté for one minute. Add the garlic and sauté for one minute more. 3. Stir in the fennel, carrot, and potato and cook for 5 minutes. Add the tomatoes, stock, and bouquet garni. Bring to a boil, then reduce the heat to simmer. Cover and cook over low heat until the fennel is very soft, about 30 minutes. 4. Discard the bouquet garni. Let the mixture cool slightly and then purée iot in batches in a food processor or blender. If you are using tofu instead of cream, add it now and purée with the rest of the ingredients. 5. Return the soup to the pot and stir in the Pernod and cream. Heat over medium-low heat to allow the soup to heat through, but do not boil. Season with salt and pepper to taste. Garnish with parsley.
>THIS WEEK’S SUBSCRIBER MENU: • Summer Squash or Zucchini • Tomatoes • Sweet “Gypsy” Peppers • Eggplant • Cucumbers • Purple Cabbage or Swiss Chard • Fennel or Kohlrabi
FRUIT SHARES: “Roza” Peaches from Cliffside Orchards in Kettle Falls (All the rain last night made it impossible to pick blackberries for Tuesday people, as a make up for last week’s lack of blackberries. We’ll try again next week.)
U-PICK THIS WEEK: Green Pole Beans Wild Blackberries (when it’s not raining)
COMING SOON: Green Beans Shell Beans Broccoli
Aaaahhh!!!
I guess I never even got last week’s list of produce up for all of you! I’m so sorry! With school starting, plus soccer game and everything the week was very chaotic.
Anyway, here’s last week’s list and I’ll make sure and get this week’s edition up promptly–like tonight or tomorrow.
Email is the best way. We’re outside much of the day so it’s difficult to return phone calls. But, if you are happy to talk to an answering machine, you can call (253) 859-5197.
Farm Address:
Whistling Train Farm
27127 78th Ave. S.
Kent, WA 98032