Category Archives: Uncategorized

>Salsify

>


Salsify Roots

Salsify is in the sunflower family, which includes the chicories, and the lettuces, as well as the artichoke. It is a long-season plant, which has long grassy leaves and a long narrow root. The delicate, creamy white, faintly oyster-flavored flesh gives it it’s alias “Oyster Plant” and “Vegetable Oyster”. I don’t taste this myself, but others must. The root is the edible part of the plant.


The root has a slightly firm texture of young turnips or celery root. It can be steamed and easten au naturel, not or chilled; sauced with herbs and butter or a vinaigrette. It can also be fried, robed in cream sauce, gratinéed, puréed; alone or in combination with other root vegetables, including potatoes.

The roots must be peeled before cooking because the skin contains a sticky substance that is easily removed with vinegar and salt. The root discolors when exposed to air, so once peeled put it in water containing lemon juice or vinegar if you want it to stay white.

BATTER-FRIED SALSIFY FRITTERS

4-5 cups Cold Water
3 tbsp. Cider Vinegar
5 Salsify Roots, about 1/2 pound in all
3/4 cup All Purpose Flour
1 cup Ice Water
1/2 tsp. Salt
Light Oil (Canola) for frying

1. Put the cold water and vinegar in a bowl. Using a vegetable peeler or paring knife, scrape away the skin of the roots. Rinse them and then cut into 2-inch lengths, then quarter them lengthwise to make thin sticks. Put them into the acidulated water to prevent discoloration.

2. Preheat an oven to 3o0° to keep the fritters warm. In a deep skillet pour in oil to a depth of 2 inches and place over medium heat until hot. (You can also pan fry in shallower oil).

3. While the oil is heating, put the flour and salt in a bowl and whisk or beat in the ice water. When the oil is ready, dip the salsify pieces, 4 or 5 at a time into the batter, and them slip them into the hot oil. Fry until golden brown and cooked through, 2 to 3 minutes. Using a slotted spoon or tongs, remove the fritters to absorbent towels to drain. Place in the oven until all the fritters have been fried. Serve hot.

PAN-ROASTED SALSIFY

4 large Salsify roots
Juice from 1 Lemon
1 tsp. Black Peppercorns
4-5 sprigs Thyme
1 Bay Leaf
1 tsp. Coriander Seeds
1-2 tbsp. Olive Oil
1 tsp. Butter
Salt and Freshly Ground Pepper

1. Peel the salsify and place in a shallow pan with water to cover, lemon juice, black pepper, 3 sprigs of thyme, bay leaf, coriander, and salt to taste. Bring to a simmer and cook until tender.

2. Remove salsify from liquid and once cooled, cut into small pieces (batons) of equal size.Heat sauté pan over medium heat and add olive oil.

3. Add salsify and season with salt and pepper. Cook until golden brown. Add the butter and the remaining sprigs of thyme and toss until the butter foams. Remove from heat and transfer to paper towels. Serve immediately.

>Winter Week 9: Making the Most of What Is Left

>

THIS WEEK’S SUBSCRIBER MENU:
• “Heart of Gold” and “Acorn” Squashes
• Variety Potatoes
• Turnips
• Baby Leeks
• Baby Carrots

In the middle of summer and into the fall, we plant our winter crops. We plan on having certain vegetables that can handle winter weather: freezing, snow, rain, etc. Some of these hardiest vegetables are Brussels sprouts, kale, cabbage, leeks. We routinely leave our root crops in the ground, because that is where they keep the best. We lose a few to critters every winter, but in the 40 years that Mike has been farming, the carrots, beets, potatoes, etc., have always been left in the ground for safekeeping. Besides keeping better, the frost and cold temperatures keep them sweet-tasting.

But we had some record-breaking temperatures this month. Not only did everything stay frozen for weeks, the last three days of the cold snap, our farm stayed at a night-time temperature of 5°. It has never been that cold in our years here. The lack of moisture made things even worse—frozen snow would have been better than dry, exposed ground. The leafy crops that made it through the freeze were desiccated as the cold air sucked the moisture out of them. The bigger carrots and beets, and most of our potatoes have turned to mush underground as they thawed out. Only the potatoes that were set the deepest—that’s the plants’ doing, not ours—have withstood the temperatures, but it has taken a lot of doing to get them out of the ground.

So, we have no greens left. Anything with leaves is dead to the ground. Most of the plants are still alive, but with no tops. We’ll have to wait until spring’s longer days and warmer temperatures raise them all from the dead.

We are loading you up with what we do have left, and we will do this again next week. Then we will be finished with our winter season, unless you want more squash. We will do our best to make up the last two weeks of winter in late March/early April, before our spring shares start. If we aren’t able to make it up in the spring, we will give everyone a credit for the last two weeks good toward next winter’s shares.

Hopefully next year’s garlic crop is ok in the ground—garlic isn’t planted very deeply. We will most likely plant more softneck garlic in the spring, if seed is available. And we will make plans to keep a supply of root vegetables in the cooler just in case this happens again next year.


>Winter Week 6: Ice and Cold

>

THIS WEEK’S SUBSCRIBER MENU:
• “Sweet Mama” Squash
• “Red” Potatoes (or whatever other potatoes are in the walk-in cooler)
• Cabbage or Collard Greens
• Garlic

COMING SOON:
Shallots
Mizuna
Baby Bok Choi

It was somewhere in the neighborhood of 9° or 10° here last night. It’s not really bad to have a freeze here and there through the winter. But when everything stays frozen day and night for several days in a row, we start losing plants.

We’re pretty sure the parsley and celery, and fennel are finished. Maybe the mustard greens and chard too. The winter spinach should be fine once it thaws out, and the kale will be fine. We’ve got plenty of cabbage and brussels sprouts and leeks. The squash is in the garage, and the garlic and shallots are protected inside. The real difficulty is that we can’t harvest much WHILE it is frozen. The ground is frozen solid, so any root crops are out of the question right now. Most leaves will wilt after thawing if we pick them frozen.

It is hard to tell the damage until after things thaw out. The problem isn’t necessarily the cold, but the drying that comes from prolonged cold without moisture. It’s better if we get some snow to help insulate and coat the leaves, but not too much of that either. It’s supposed to finally rise above freezing for a bit tomorrow, so we can get more picked for the weekend, and then rain. Rain would be good after all the cold. The plants will suck it up.

We had planned for next week to be a double harvest week, so that we can all take a break for Christmas week. We’ll have to see what happens after the weekend before we can confirm that plan.

Stay warm and hope for the best!

>Winter Week 5: Spousabouts & Pumpkin Pancakes

>

THIS WEEK’S SUBSCRIBER MENU:
• “Festival” Squash
• “Red” Potatoes
• Fennel
• Turnips with Greens
• “Osaka Purple” Mustard Greens
• Pepper Cress

COMING SOON:
Shallots
Mizuna
Baby Bok choi

When Della was about three years old, we first shared a sweet winter vegetable with her. Her name for the dish was “spousabouts”, which translated into adult English means “Brussels Sprouts”. She loved them.

Just when I start to wonder if anyone reads this blog, finally someone posted a comment requesting my recipes for pumpkin pancakes and pumpkin custard. Both are pretty ad-hoc:

For pumpkin custard, I just make pumpkin pie filling and pour it in a baking dish and bake it like pie. No crust required. We eat it for breakfast or dessert. Here are the pie recipes I swiped from Martha Stewart years ago. I like the tang of the molasses version, but the kids like the brown sugar or maple syrup versions better.

For Pumpkin Pancakes, I use a multi-grain mix like Bob’s Red Mill, or something equivalent. I start with a big plop of puréed pumpkin (or sweet potato, or mashed banana, or applesauce, depending on what leftovers are laying around). I think I usually use 1-1/2 cups of mushy stuff. Then I put in a very big egg or two smaller ones. (The eggs help hold everything together.) Beat those together with a fork and a good shake of cinnamon and/or cardamom. “A good shake” is about 1-1/2 teaspoons, unless it dumps out too much, but no-one really cares if there’s too much cinnamon anyway. Then I put in a good 1/2 cup of pancake mix per person. If I’m especially hungry I’ll use heaping scoops. Then pour in milk and mix until it’s all the right consistency for pouring on the griddle. The range that came with our house has a big griddle on top, so I can make pancakes for everyone all at once, and we can all eat together—it’s one of my favorite things.


We like our pancakes with fruit (frozen berries, sliced pears, or leftover cranberry sauce are good winter favorites) and whipped cream. We also like peanut butter and real maple syrup.

Mmmm. I can’t wait for Saturday to come around again.

Brussels Sprouts

Thanks to extensive selective breeding in 13th century Belgium we now have the pleasure of savoring the Brussels Sprout. They resemble tiny cabbages (as a child, I disdainfully thought of them as Martian heads) and are a fantastic mutant of the cabbage family. However, the two differ in their growth habit.

Cabbages grow fairly low to the ground and form a single dense head in the center of a lush rosette of leaves. Once the main head is harvested, if one is patient, the plant will regrow with four or five mini cabbages at the base of the plant. This isn’t a common sight because most farmers and gardeners pull up the stump once the cabbage head is harvested. This is where those Belgian gardeners of the Middle Ages began their experiment.

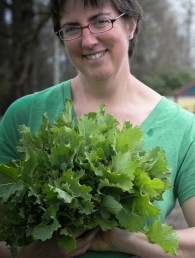
Brussels Sprout plants start out in life looking just like a cabbage plant. But after two or three months of growth, the main stalk begins to elongate. Instead of forming a tight head, all of those leaves instead begin to stretch out along the lengthening stalk, until at four or five months of age, the plant resembles a miniature prehistoric tree, rather than a cabbage. If one looks closely beneath each leaf, a tiny bud can be seen—this bud will become a sweet sprout. After another month or two (by now it’s been nearly half a year) the three-foot stalk is crowded with tiny cabbages just begging to be nibbled on (and just like cabbages, sprouts come in purple as well as green).

At this point I have to be honest—I have hated Brussels Sprouts for as long as Ican remember. In the 1970’s and 80’s, the only sprouts found in the supermarket were in the 10-ounce frozen cube form. They were squishy, mushy, and they tasted worse than burned cabbage. Brussels Sprouts and Squash were the only foods I remember absolutely detesting as a child.

But, things change. Several years ago as I was looking through seed catalogs, I started to wonder if I had gotten off on the wrong foot with these sprouts. Maybe if they were grown and harvested properly, I would love them as much as I learned to love kale, beets, and winter squash! So Ibegan a quest to grow them. Sometimes Mike thinks I’m crazy—it took me three years, but I finally figured out the timing with this long-season crop. They need to be seeded in April in the greenhouse, planted outside in June or July, then they need to grow slowly. And they absolutely must NOT be harvested before winter frosts have chilled them thoroughly and slowly.

For all this cold weather actually sweetens the sprouts. And I must say, they are DELICIOUS! We have been known to make a meal of just Brussels Sprouts and rice—and Mike is a carnivore. Imean, we can each eat an entire stalk of sprouts in one meal. So, I’m a convert, and I hope you will be too.

BRUSSELS SPROUTS CARBONARA

3/4 pound Brussels Sprouts
1 tbsp. Butter
1 tsp. Olive Oil
1/2 pound Spaghetti Noodles
2 Large Egg Yolks
1/2 cup Cream
Cayenne Pepper (to taste)
1/4 cup Chopped Cooked Bacon (if desired)
2 cups Freshly Grated Parmesan Cheese

1. Half (or quarter, if large) the Brussels Sprouts.

2. Blanch in boiling salted water for 4 minutes and drain.

3. Heat a large ovenproof skillet over high heat. Add butter and olive oil, swirl to melt, and add the blanched sprouts.

4. Season with salt and toss to coat with the butter and oil. Turn the sprouts cut-side down, reduce the heat to medium, and cook for another 6 to 8 minutes, shaking the pan occasionally, or until browned on all sides.

5. Meanwhile, cook spaghetti according to package instructions, reserving 1 cup pasta water as the spaghetti cooks

6. In a serving bowl, whisk together egg yolks, cream, and a pinch of cayenne pepper (to taste) to blend, then add the hot pasta, bacon (if desired), and as much reserved water as necessary to coat the noodles with the cream. Add Parmesan cheese and the sprouts, and toss to mix. Serves 2-4.

Recipe courtesy of Renee Erickson, from “A Boat, A Walrus, and A Walrus”.

BRUSSELS SPROUTS WITH WALNUT OIL

1 tbsp. Butter
1 1/2 tbsp. Walnut Oil (or other nut oil)
2 tbsp. chopped Italian Parsley
2 tbsp. thinly sliced Chives or Scallions
1 pound Small Brussels Sprouts
Salt and Ground Black Pepper

1. Put butter, walnut oil, parsley and chives in a serving bowl and set aside.

2. Trim Brussels sprout ends. Bring a large pot of salted water to a boil over high heat. Add sprouts and cook until just tender, about 10 minutes. Drain and return to pot over low heat. Cook briefly, shaking the pot, until any water has evaporated.

3. Transfer sprouts to the serving bowl and season well with salt and pepper. Toss until butter melts and seasonings evenly coat the sprouts.

SAUTEÉD BRUSSELS SPROUTS

Fresh Brussels Sprouts
Olive Oil or Unsalted butter
Chicken or Vegetable Stock
Fresh or Dried Thyme Leaves
Lemon Juice
Salt and Pepper

1. Slice the sprouts thin, about 1/8-inch thick. Heat a sauté pan, add a small amount of olive oil or unsalted butter, and sauté the sprouts for a few minutes. Add about 1/4 inch of stock to the pan and continue cooking until tender. Season with salt, pepper, thyme, and a squeeze of lemon juice. Continue to cook until you end with an emulsified liquid that just coats the sprouts.

BRUSSELS SPROUTS LEAVES WITH BACON

Fresh Brussels Sprouts
Diced Onion
Bacon, or Pancetta, diced (or substitute capers or another salty addition)
White Wine
Chicken or Vegetable Stock
Salt and Pepper

1. Cut out the stems of the Brussels sprouts and separate the sprouts into leaves. Thinly slice the tightly compact centers.

2. Sauté some diced onion and pancetta or bacon in olive oil until softened. Add the sprout leaves, season with salt, and moisten with a little white wine and water or stock. Cover and simmer for 10 to 15 minutes, until just tender. Taste for seasoning, grind black pepper over, and serve.

>Winter Week 4: Thanksgiving

>THIS WEEK’S SUBSCRIBER MENU:

• “Table Queen” Acorn Squash
• “German Butterball” Potatoes
• Celery or Celery Root
• Kale
• Arugula
• Parsley
• “D’Anjou” Pears from Cliffside Orchards

COMING SOON:
Brussels Sprouts
Shallots
Mizuna
Pepper Cress

This is our week of Thanksgiving. We had originally planned on providing a double share this week, but since we are hosting our family’s Thanksgiving dinner, we had to finish our kitchen and dining room. That meant a lot of hours working on drywall and putting down the floor. We did indeed get everything finished—Wednesday. Plenty of time to make pies Wednesday night and prepare the rest of the feast for Thursday cooking.

We had one of our own turkeys—declared delicious and moist by the entire family. We gathered as much food as possible from our own backyard, resorting to only cranberries and sweet potatoes from the store, and apples from Cliffside Orchards—apple pie is my dad’s favorite. But, my Winter Luxury pumpkin pies also turned out delicious. I can’t believe how much pumpkin purée I got from the pumpkin I cooked. Plenty for two pies, Saturday pancakes, and an extra dish of pumpkin custard to snack on as well.

We are so thankful to be in our new house this winter. As it turns out we need to replace the furnace, but the big gas range is working nicely for heating the house, as well as cooking. So, hopefully that project can wait until next summer. We are especially grateful to all of the families who prepaid for 2010 shares so that we could get all the necessary work done on the house to be able to live in it this year.

We hope you all had a lovely Thanksgiving, and we hope that the winter proceeds calmly through the rest of the holidays and dark season.

>Winter Week 3: Almost Thanksgiving

>THIS WEEK’S SUBSCRIBER MENU:

• Pie Pumpkin—either “Winter Luxury Pie”, “New England Pie”, or “Rouge Vif d’Etampes”
• “French Fingerling” Potatoes
• Carrots
• Beets
• Collard Greens
• Mustard Greens
• Leeks

COMING SOON:
Brussels Sprouts
Shallots
Mizuna
Parsley
Pears

Thanksgiving is next week. The turkeys that we’ve raised since the beginning of June are going to the butcher Thursday, and our new kitchen has been chosen to host our extended family for Thanksgiving. The nice thing about hosting is that you get to choose what to eat and how complicated to make it (or keep it from becoming).

NOTE: We are NOT providing a double share this year for the holiday as we have in previous years. We will be harvesting a normal amount for all the weeks in November. Please do not take double this week or next week, just what we have indicated.

I like a simple Thanksgiving, but there are a few things that I feel are necessary to complete the meal:
1. A great turkey
2. Homemade pumpkin pie, with enough to have for breakfast the next day
3. Cranberry sauce made from cranberries, sugar, and water. Not a can. (I like canned, but not for Thanksgiving.)
4. Gravy made from the great turkey. I love gravy on everything.

My sister asked if everyone should contribute money to buy the food. But why? The only things I need to buy are cranberries, bread (for the stuffing), and sweet potatoes. And butter, for the pie crust. (I have home-made butter in the freezer, but it takes so much to make pie crust, I hate to put it in there. It deserves to be on top of something, it’s so good.)

Here’s my Thanksgiving menu:
• One Perfect Turkey, with simple herb stuffing. No sausage, oysters, or nuts.
• Turkey Gravy
• Orange sweet potatoes, caramelized with butter and orange slices
• Mashed “Yukon Gold” potatoes, or maybe “German Butterball”, from the back of the farm
• Roasted roots (carrots, beets, celeriac, and fennel) from the middle of the farm
• Coleslaw, with cabbage from the north of the farm
• Molasses Pumpkin Pies, made with our own pumpkin
• Cranberry Sauce
• Sweet Potato Biscuits

I’m going to get started Monday, and the enormous double-oven, six-burner, gas range that came with our house will be heating up our house all week in preparation for the turkey finale Thursday morning.

You can find recipes for pumpkin pie on the “How To Eat It” list in the sidebar. There are lots of other recipes there too, and if you can’t find what you are looking for, Google it! There are so many good recipes online. Try Martha Stewart or Epicurious, or Saveur.

>Winter Week 2: Celeriac & Squashy Soups

>THIS WEEK’S SUBSCRIBER MENU:

• “Heart of Gold” Winter Squash
• “Rose Gold” Potatoes
• Celeriac
• Collard Greens
• Mustard Greens
• Spinach
• Sorrel or Dandelion Greens
COMING SOON:
Carrots & Beets
Brussels Sprouts
Shallots
Leeks


>Winter Week 1:

>

THIS WEEK’S SUBSCRIBER MENU:

• “Delicata” Winter Squash
• Potatoes
• Garlic
Fennel
• “Red Russian” Kale
• Arugula
COMING SOON:
Carrots & Beets

This is the first week of our Winter Season, and what a beautiful one it is. The greens are gorgeous now, the squashes are all harvested and put away, and the potatoes are gaining richness as they rest in the ground and wait to be dug.


>Summer Week 20: End of Summer

>

THIS WEEK’S SUBSCRIBER MENU:

• “Honey Bear” Winter Squashes
• Potatoes
• Garlic
• Fennel or Arugula
• Kale
• Spinach
• Arugula
• Beet Greens or Celery

PUMPKIN PATCH: We have a great pumpkin patch this year! Take as many pumpkins as you want. You can pick them up on our usual pick up days, either Tuesday afternoons or Saturday afternoons. Don’t forget to enter our Biggest Pumpkin Contest!

COMING SOON:
Delicious Winter Greens

Winter Shares start next week, and this is the last week of our Summer Season. Thank you so much for joining in this fabulous season with us! If you are continuing on through winter, we’ll look forward to seeing you again next week—you will be getting an email this week about winter pickup. If you are taking a break from fresh, delicious vegetables, we hope that you will be back to enjoy next summer’s bounty. 

Happy Fall!